React native TextInput: How to detect a change in text and editing ends:
The TextInput component of React Native is used to create editable text components. In this tutorial, we will learn how to use the TextInput component to listen to what the user is entering and when the editing ends.
We will create one simple react native application using npx react-native@latest init RNProject command. The screen will contain one TextInput and one Text component. If the user enters any value into the TextInput component, it will change the Text component content based on the entered text.
Detecting text change and editing ends:
The TextInput component comes with a lot of different prop similar to any other component of React Native. For this example, we will use the following two prop:
onChangeText: It takes a callback function that is called every time the text of theTextInputchanges. The changed text is passed to the callback function as an argument.onEndEditing: This is a callback that will be called when text input ends. Note that the text will not be passed with props.
React Native program:
The following React Native example shows how to detect text change and edit ends. For this example, we are editing the code of the App.js file:
import { useState } from 'react';
import { StyleSheet, Text, View, TextInput } from 'react-native';

export default function App() {
  // 1
  const [text, setText] = useState('');

  //2
  const changeText = (inputText) => {
    const formattedText = '\u{1F632}' + inputText;
    setText(formattedText);
  };

  //3
  const endEditing = () => {
    const formattedText = text + '\u{2708}';
    setText(formattedText);
  };

  //4
  return (
    <View style={styles.container}>
      <TextInput
        style={styles.textinput}
        placeholder="Enter your text here"
        onChangeText={changeText}
        onEndEditing={endEditing}
      />
      <Text style={styles.textView}>{text}</Text>
    </View>
  );
}

//5
const styles = StyleSheet.create({
  container: {
    flex: 1,
    backgroundColor: '#F5FCFF',
  },
  textinput: {
    fontSize: 30,
    textAlign: 'center',
    marginTop: 60,
    marginRight: 20,
    marginLeft: 20,
    padding: 10,
    borderColor: 'grey',
    borderWidth: 1,
    borderRadius: 5,
  },
  textView: {
    fontSize: 40,
    marginTop: 30,
    textAlign: 'center',
  },
});
Download it on GitHub
Explanation:
The commented numbers in the above program denote the step number below:
- The
textis a state variable to assign the user input text. - The
changeTextmethod takes one string as the parameter and updates the value oftextwith thesetTextfunction. It adds one Unicode character to the start of the string before updating the variable. - Similar to the
changeTextmethod, theendEditingmethod adds one different Unicode character to the end of the text. - We are using the
onChangeTextandonEndEditingprop of theTextInputcomponent. TheonChangeTextprop calls a callback function on every text change in theTextInputand theonEndEditingprop calls a callback function at the end of editing. It shows oneTextcomponent below theTextInputcomponent. TheTextcomponent shows the current value oftext. - The variable
stylesis used for styling the components.
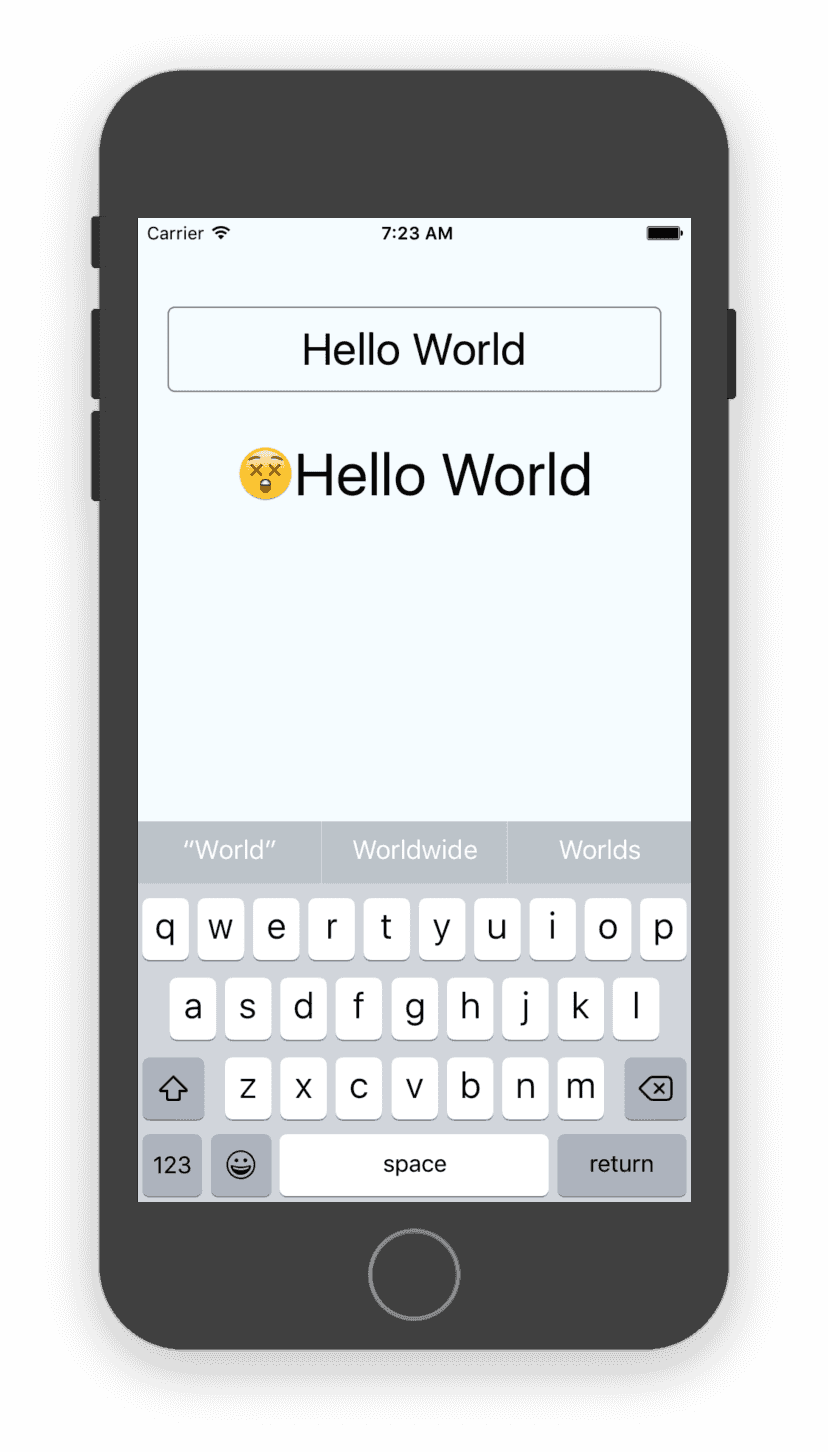
Once the user starts editing the TextInput, it updates the value of text and it is reflected in the Text component.
Output:
It will look as below when the user is entering some text in the TextInput:

And, when the editing is completed, i.e. if the enter key is pressed, it will look as below:

As you can see, we are changing the text before displaying it to the user while editing and after editing is completed.
Conclusion:
Detecting the text change in TextInput comes in handy if you want to validate the user input text continuously. You can also validate user input whenever the input is completed e.g. we can check if the entered email, password, etc. are valid or not. You can raise a pull request if you want to contribute more ways to this blog post.
You might also like:
- React Native sectionlist explanation with example
- Status bar in React Native explanation with example
- SafeAreaView in React Native and where to use it
- TouchableHighlight in React Native with example
- React Native program to change the value of a text on button click
- How to create circular buttons in React Native

