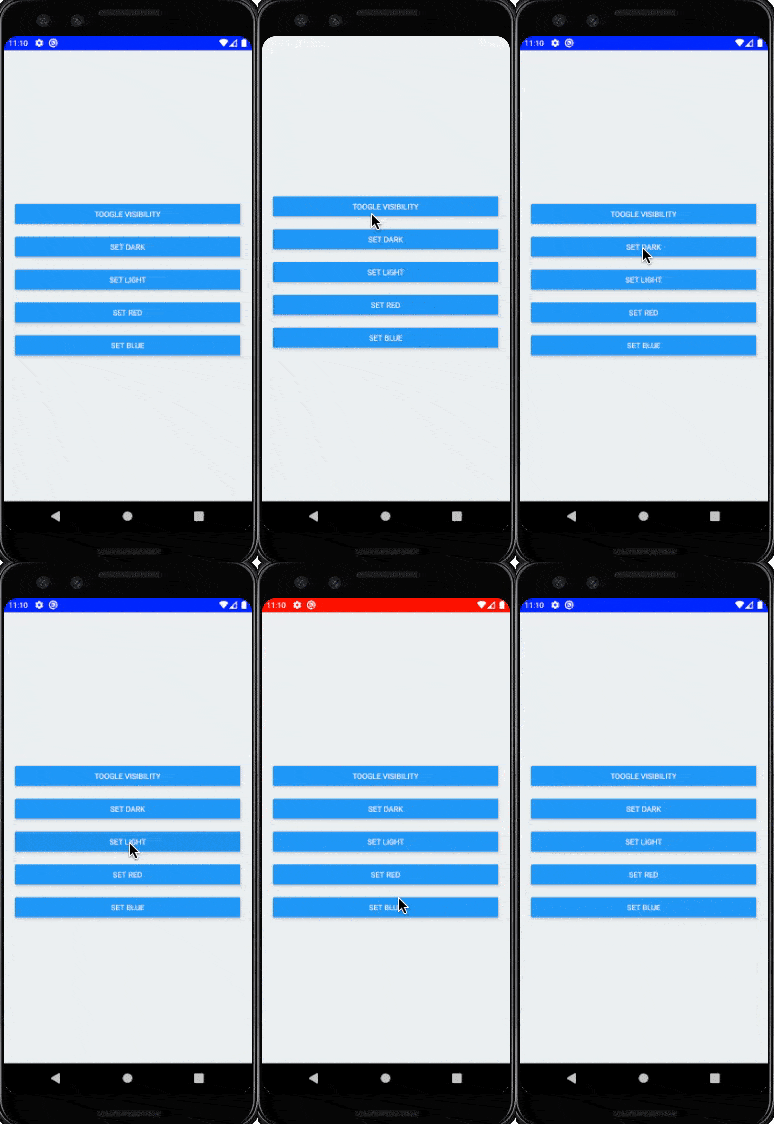
Introduction :
Status bar can be styled starting from Android Kitkat. You can change the color of the status bar and change the style in Android.
In this post, I will show you how to create and style one status bar in React native. StatusBar is the component that we need to import.
Before moving to the example, let me show you the props :
Props and constants of StatusBar :
[Constant][Android] currentHeight :
This is the current height of the status bar. Available only on Android.
[Boolean] animated :
Boolean value to define to animate or not for status bar property change.
[Android] backgroundColor :
This is the background color of the status bar.
barStyle :
It is an enum type and can be of ‘default’, ‘light-content’ or ‘dark-content’. Depends on the style, the status bar text looks different.
[Boolean] hidden :
Define if the status bar should be hidden or not.
[iOS][Boolean] networkActivityIndicatorVisible :
Define if the network activity indicator is visible or not.
[iOS] showHideTransition :
hidden prop is used to show hide the status bar. This flag handles the transition effect while showing/hiding. It takes one enum value ‘fade’ or ‘slide’.
[Boolean][Android] translucent :
This is a boolean flag to define if the status bar is translucent or not. If we set it as true, the app will draw under the status bar.
Example program :
In this program, I will show you how to do create one StatusBar and how to change the style and color dynamically.
Create one basic react native program and replace the below content in your App.js file :
import React, {useState} from 'react';
import {Button, StyleSheet, StatusBar, View} from 'react-native';

const App = () => {
  const [visibility, setVisibility] = useState(false);
  const [currentStyle, setCurrentStyle] = useState('default');
  const [color, setColor] = useState('blue');

  const changeVisibility = () => {
    setVisibility(!visibility);
  };

  const setDarkStyle = () => {
    setCurrentStyle('dark-content');
  };

  const setLightStyle = () => {
    setCurrentStyle('light-content');
  };

  const setRed = () => {
    setColor('red');
  };

  const setBlue = () => {
    setColor('blue');
  };

  return (
    <View style={styles.container}>
      <StatusBar
        backgroundColor={color}
        barStyle={currentStyle}
        hidden={visibility}
      />

      <View style={styles.button}>
        <Button title="Toogle Visibility" onPress={() => changeVisibility()} />
      </View>
      <View style={styles.button}>
        <Button title="Set dark" onPress={() => setDarkStyle()} />
      </View>
      <View style={styles.button}>
        <Button title="Set light" onPress={() => setLightStyle()} />
      </View>
      <View style={styles.button}>
        <Button title="Set red" onPress={() => setRed()} />
      </View>
      <View style={styles.button}>
        <Button title="Set blue" onPress={() => setBlue()} />
      </View>
    </View>
  );
};

const styles = StyleSheet.create({
  container: {
    flex: 1,
    justifyContent: 'center',
    paddingTop: 20,
    padding: 8,
  },
  button: {
    padding: 10,
  },
  textStyle: {
    textAlign: 'center',
  },
});

export default App;
Explanation :
We have one StatusBar with background color as color, bar-style as currentStyle, and hidden is defined by the visibility flag.
We have five buttons here to change the visibility, change the style, and to change the color of the status bar. If you run it on an emulator and click any of these buttons, it will give different results as like below :


